| Home | | Week 1 | | Week 2 | | Week 3 | | Week 4 |
My documentation of the stuff I learned at Pre Fab Workshop.
Week 1
1. Introduction and Lab Setup
2. Assignment: Ubuntu on Virtual Box
3. Assignment: Fab Modules on Ubuntu
4. Rhino 2D and 3D design: Introduction
5. Assignment: Designing in Rhino
1. Introduction to FabLab and Fab Academy
FabLab has interesting computer controlled machines and instruments which can be used to make almost anything. As of now, FabLab cannot be used for mass manufacturing, but for prototyping innovative products. Now Fablab is a collaborative global network spread across many countries. As per records, there are a total of 565 FabLabs around the world. And we have two here in Kerala and I am lucky to be a part FabLab Kochi. I am truly looking forward to make a Fab movement in Kerala.
How to make almost anything
Fab Academy happens every year from January to June 2016. The online interactive classes for the course "How to make almost anything" are conducted by Prof. Neil Gershenfeld, the co-founder of FabLab, every Wednesday in between this period. Assignments will be give to participants on a weekly basis. All students also needs to complete and present a project by the end of the course.Setting up the Lab
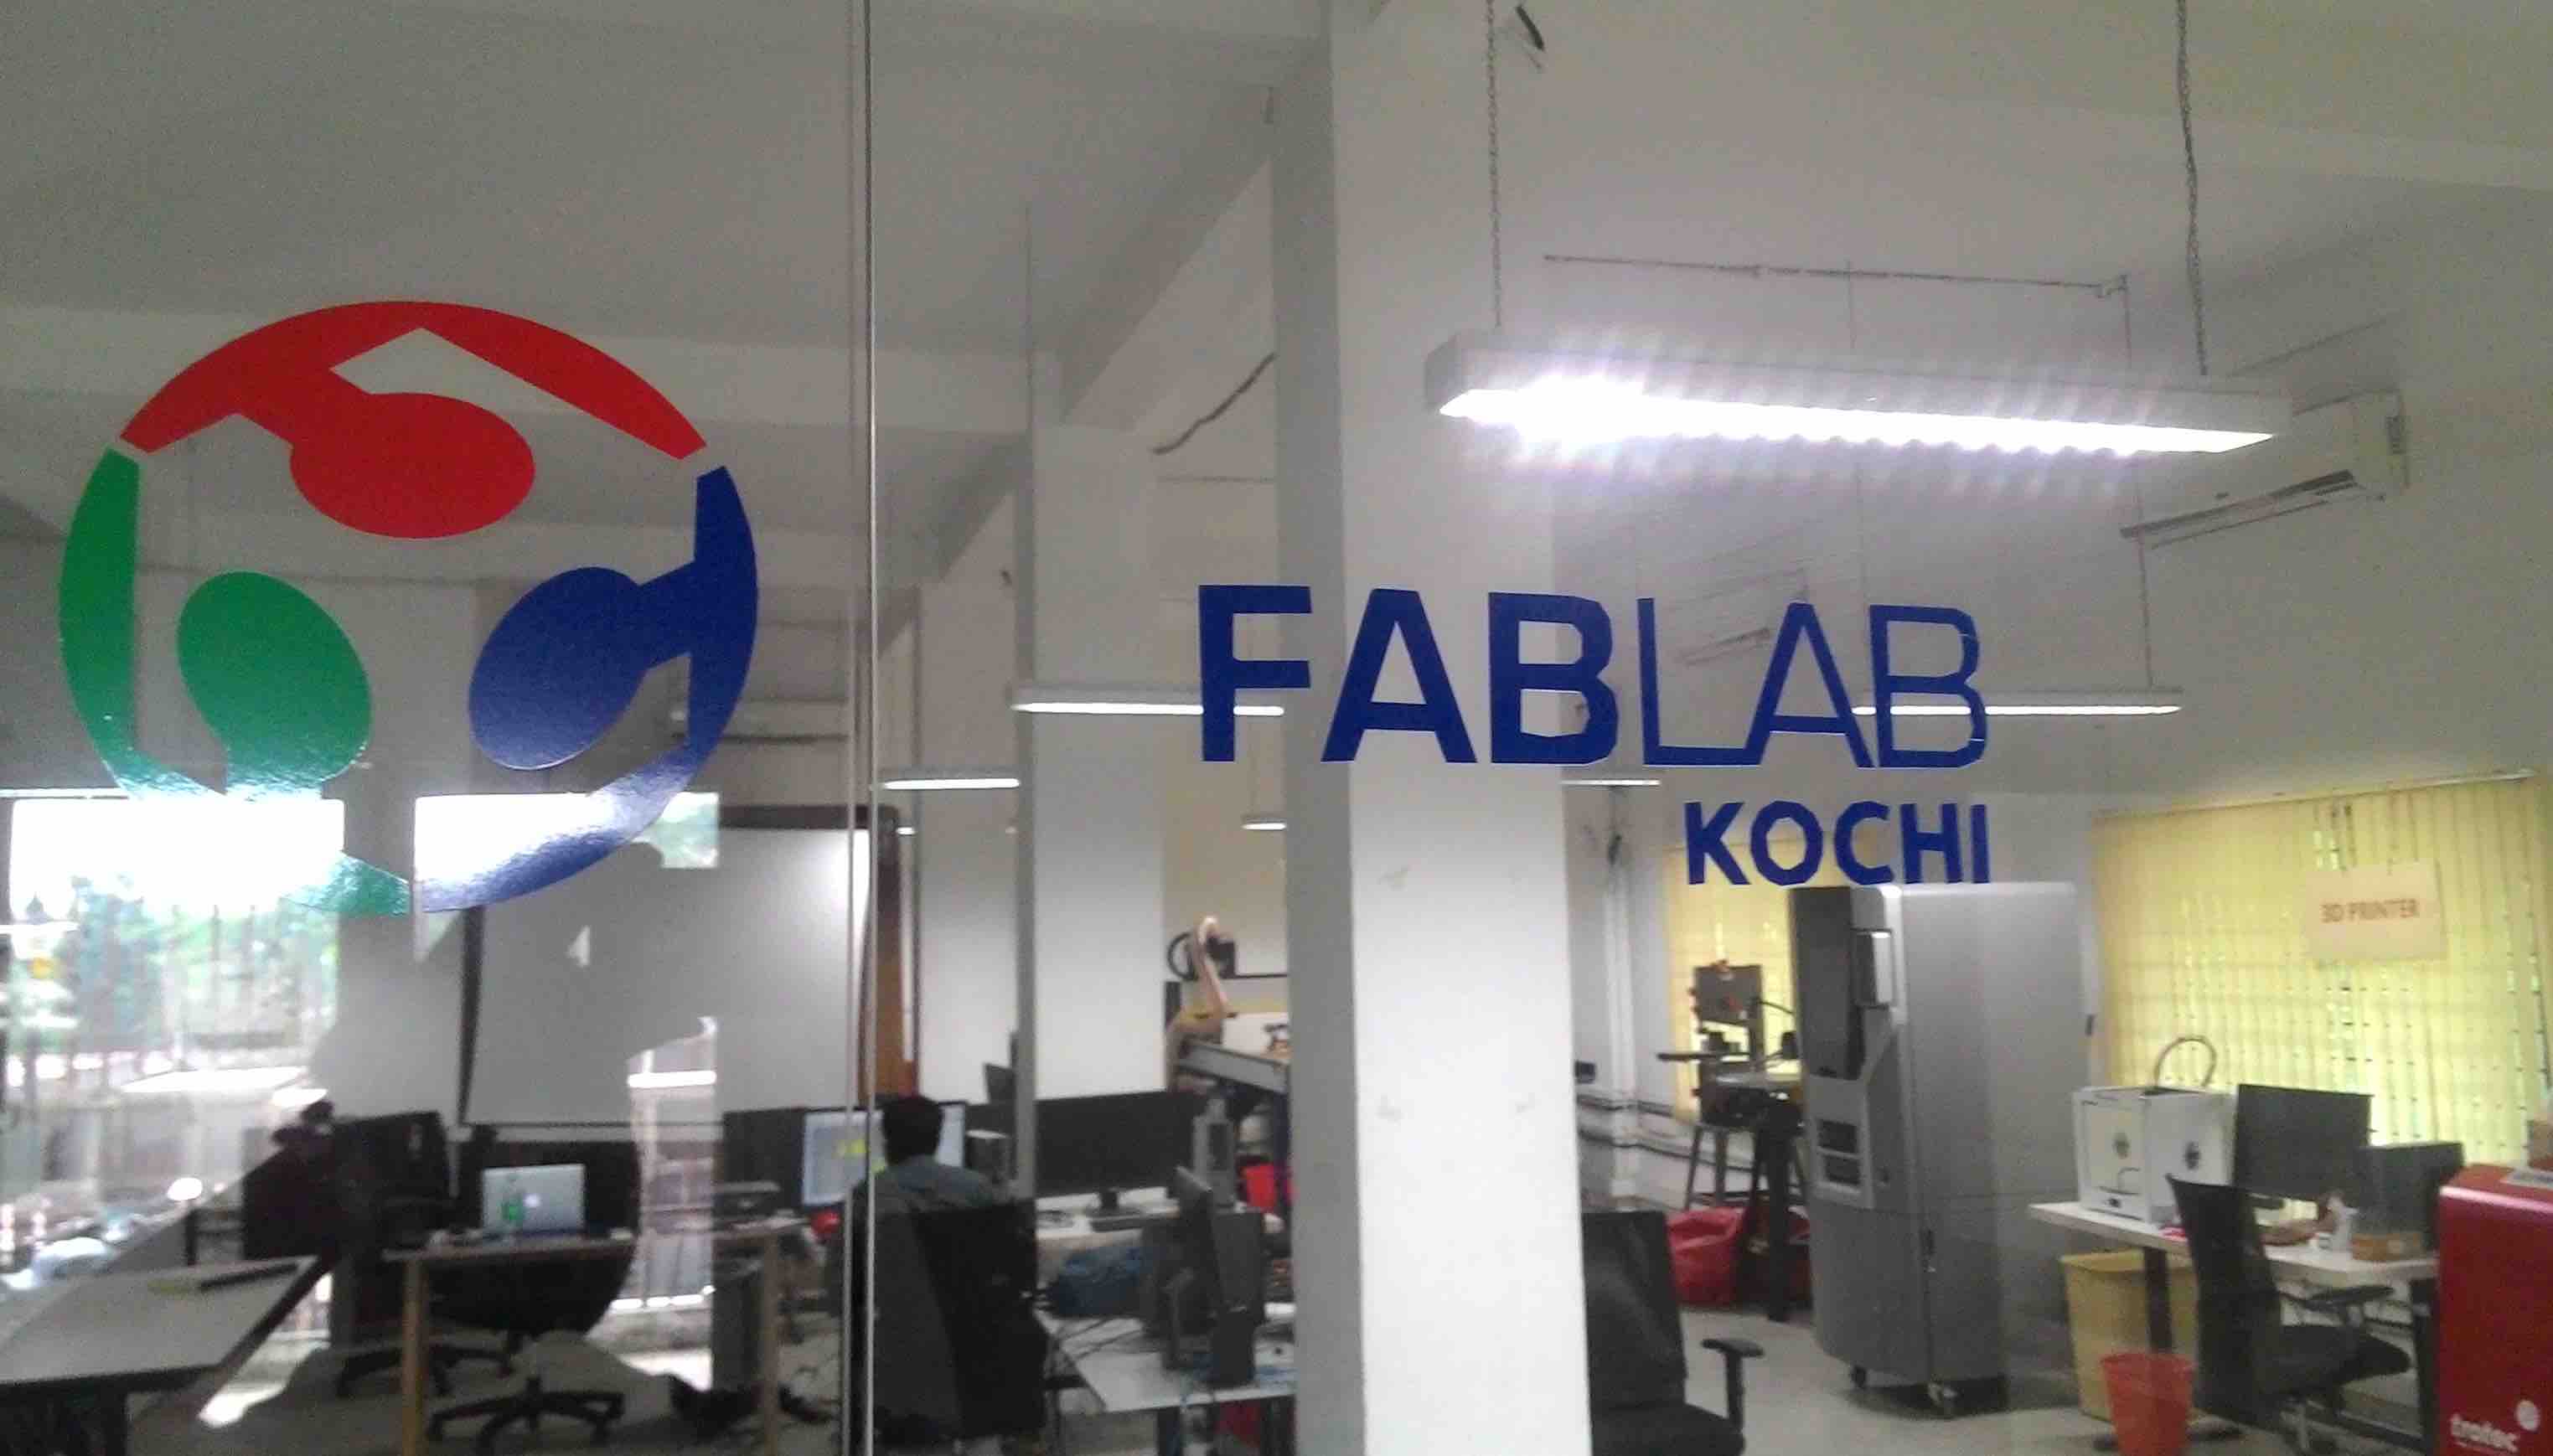
FabLab Kochi panorama view

Luciano Betoldi, our Fablab trainer started off the workshop by rearranging and cleaning the lab in the best way to suit the Pre Fab workshop. This was followed by a self introduction session. By the second day, we had 8 members attending the workshop at Kochi FabLab. FabLab Kochi is located at Startup Village, Kinfra Hi-Tech Park, Kochi, India. The lab has been setup by Kerala Startup Mission. Its been only a few months since we have setup this lab and the response has been great. We had a few startups who are incubated at Startup Village.
Back to top
2. Assignement: Ubuntu on Virtual Box
The fab modules for using FabLab machines/equipments runs best on Ubuntu and I have always adored Ubuntu and all the open source stuff. But I have been using mac for quite sometime now for my work and I haven’t got the time to explore and play around with Ubuntu.
I took this opportunity to install virtual ubuntu on my mac using virtual box. Virtual Box virtual machine is a free virtualisation software by Oracle that can be downloaded from the internet. This allows you to install and run ubuntu on top of my mac.
The method to get is done is fairly simple.
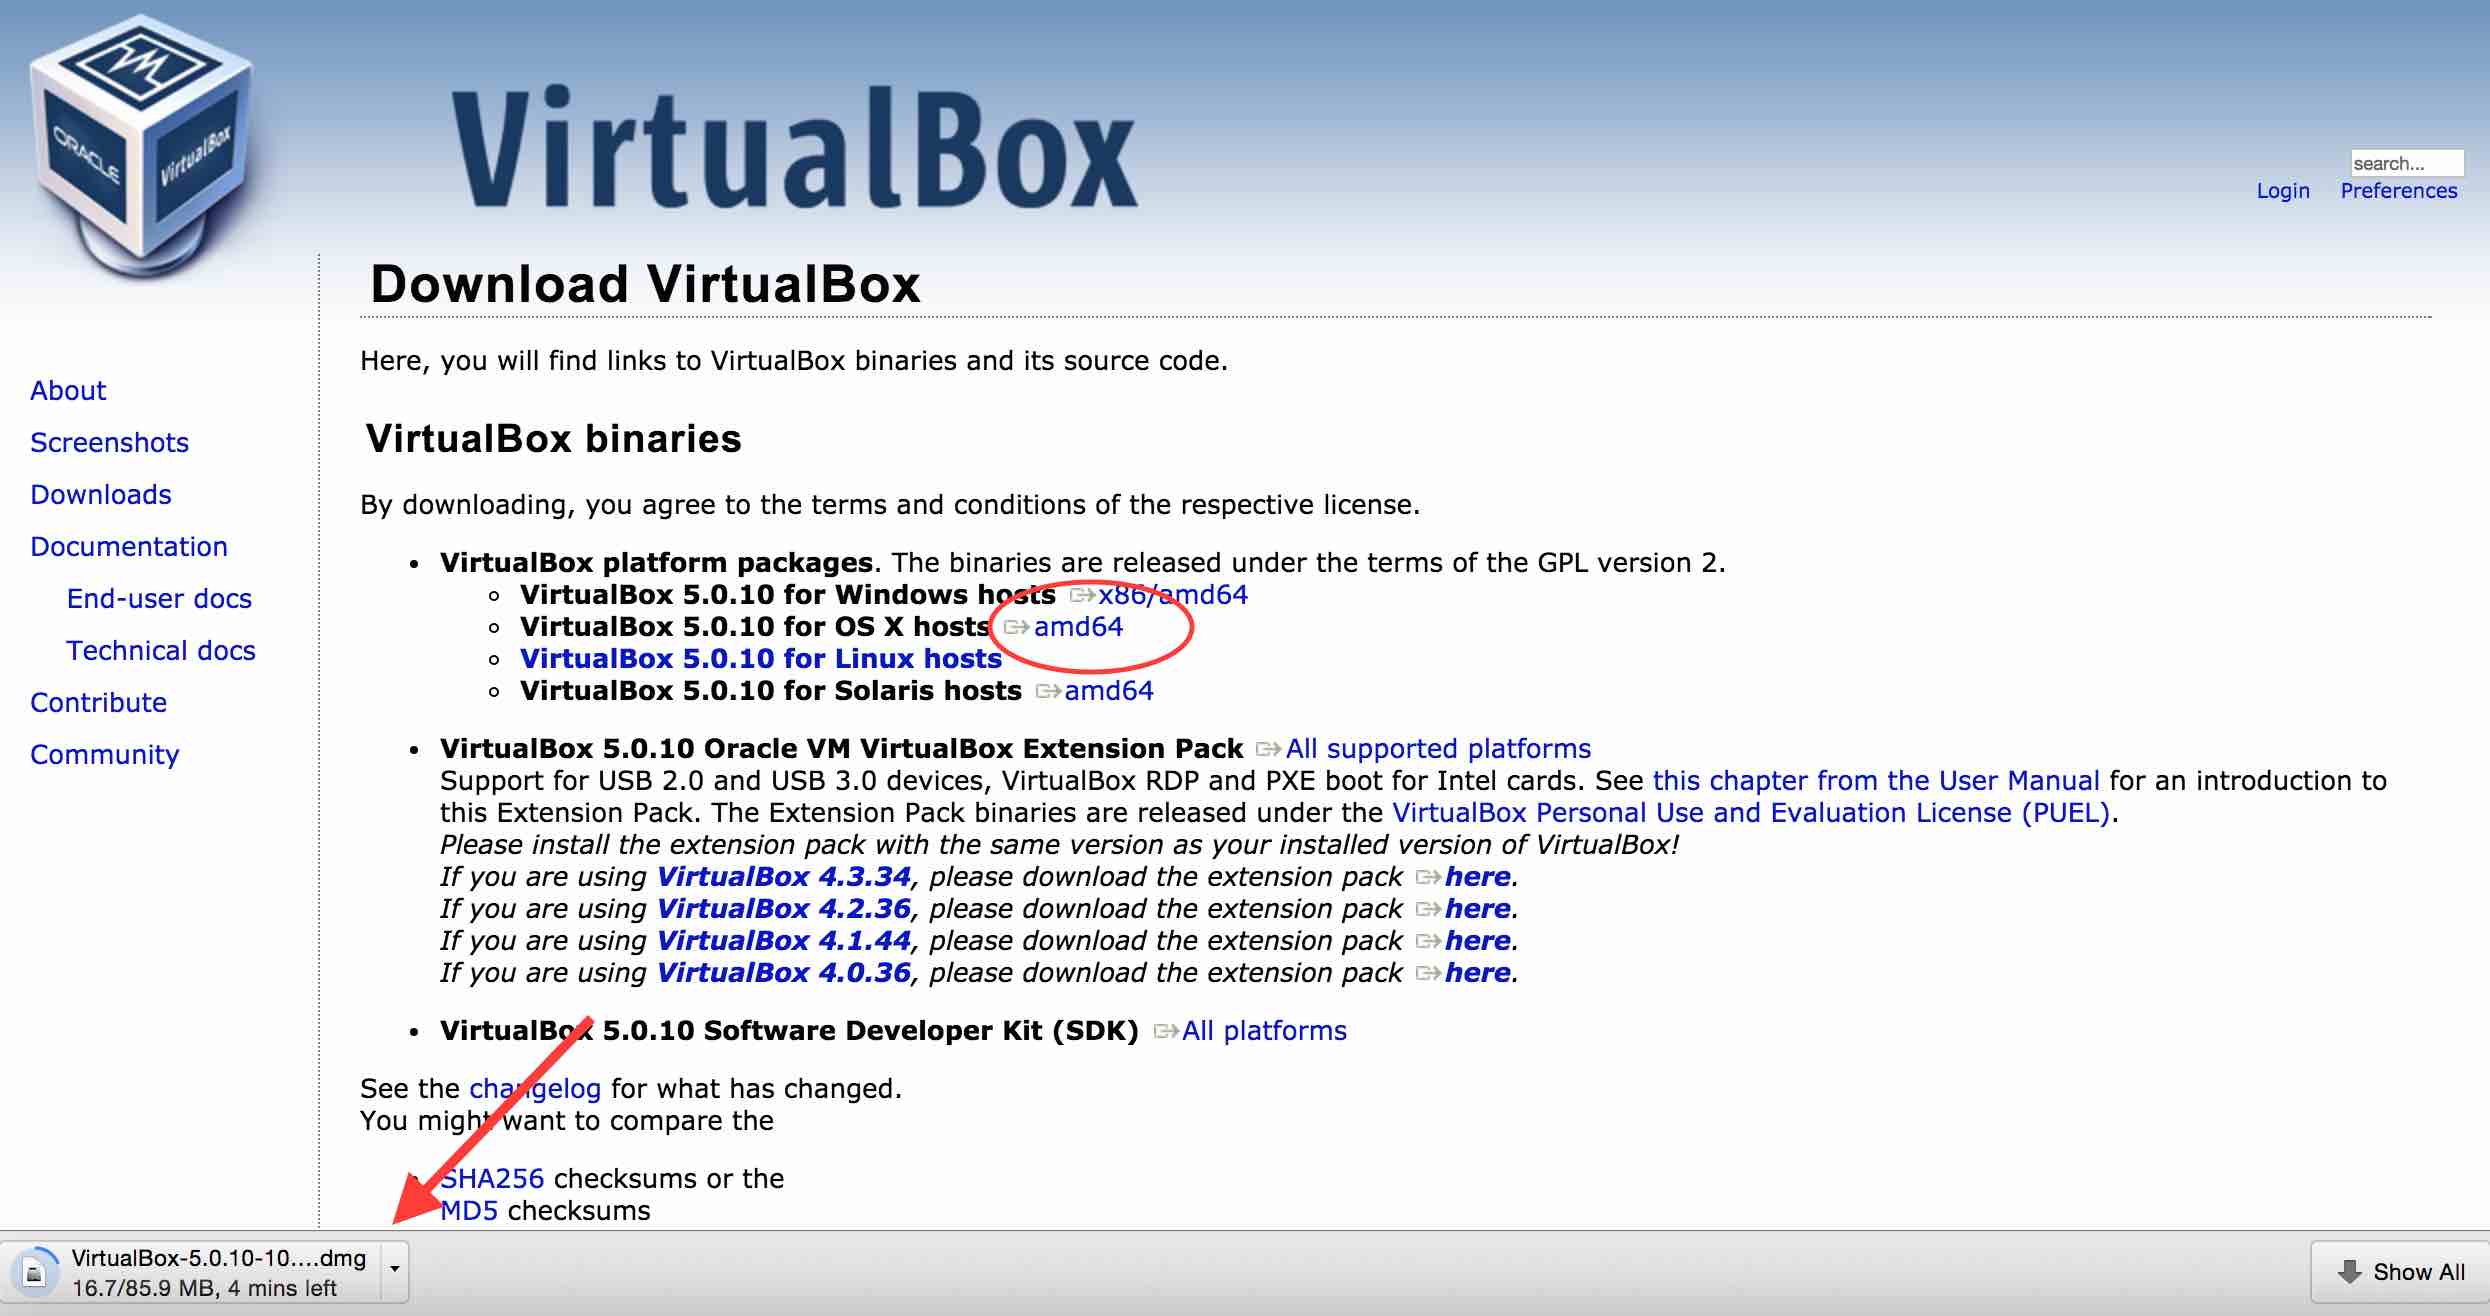
1. Download the Virtual Box Software from the web, Install it.
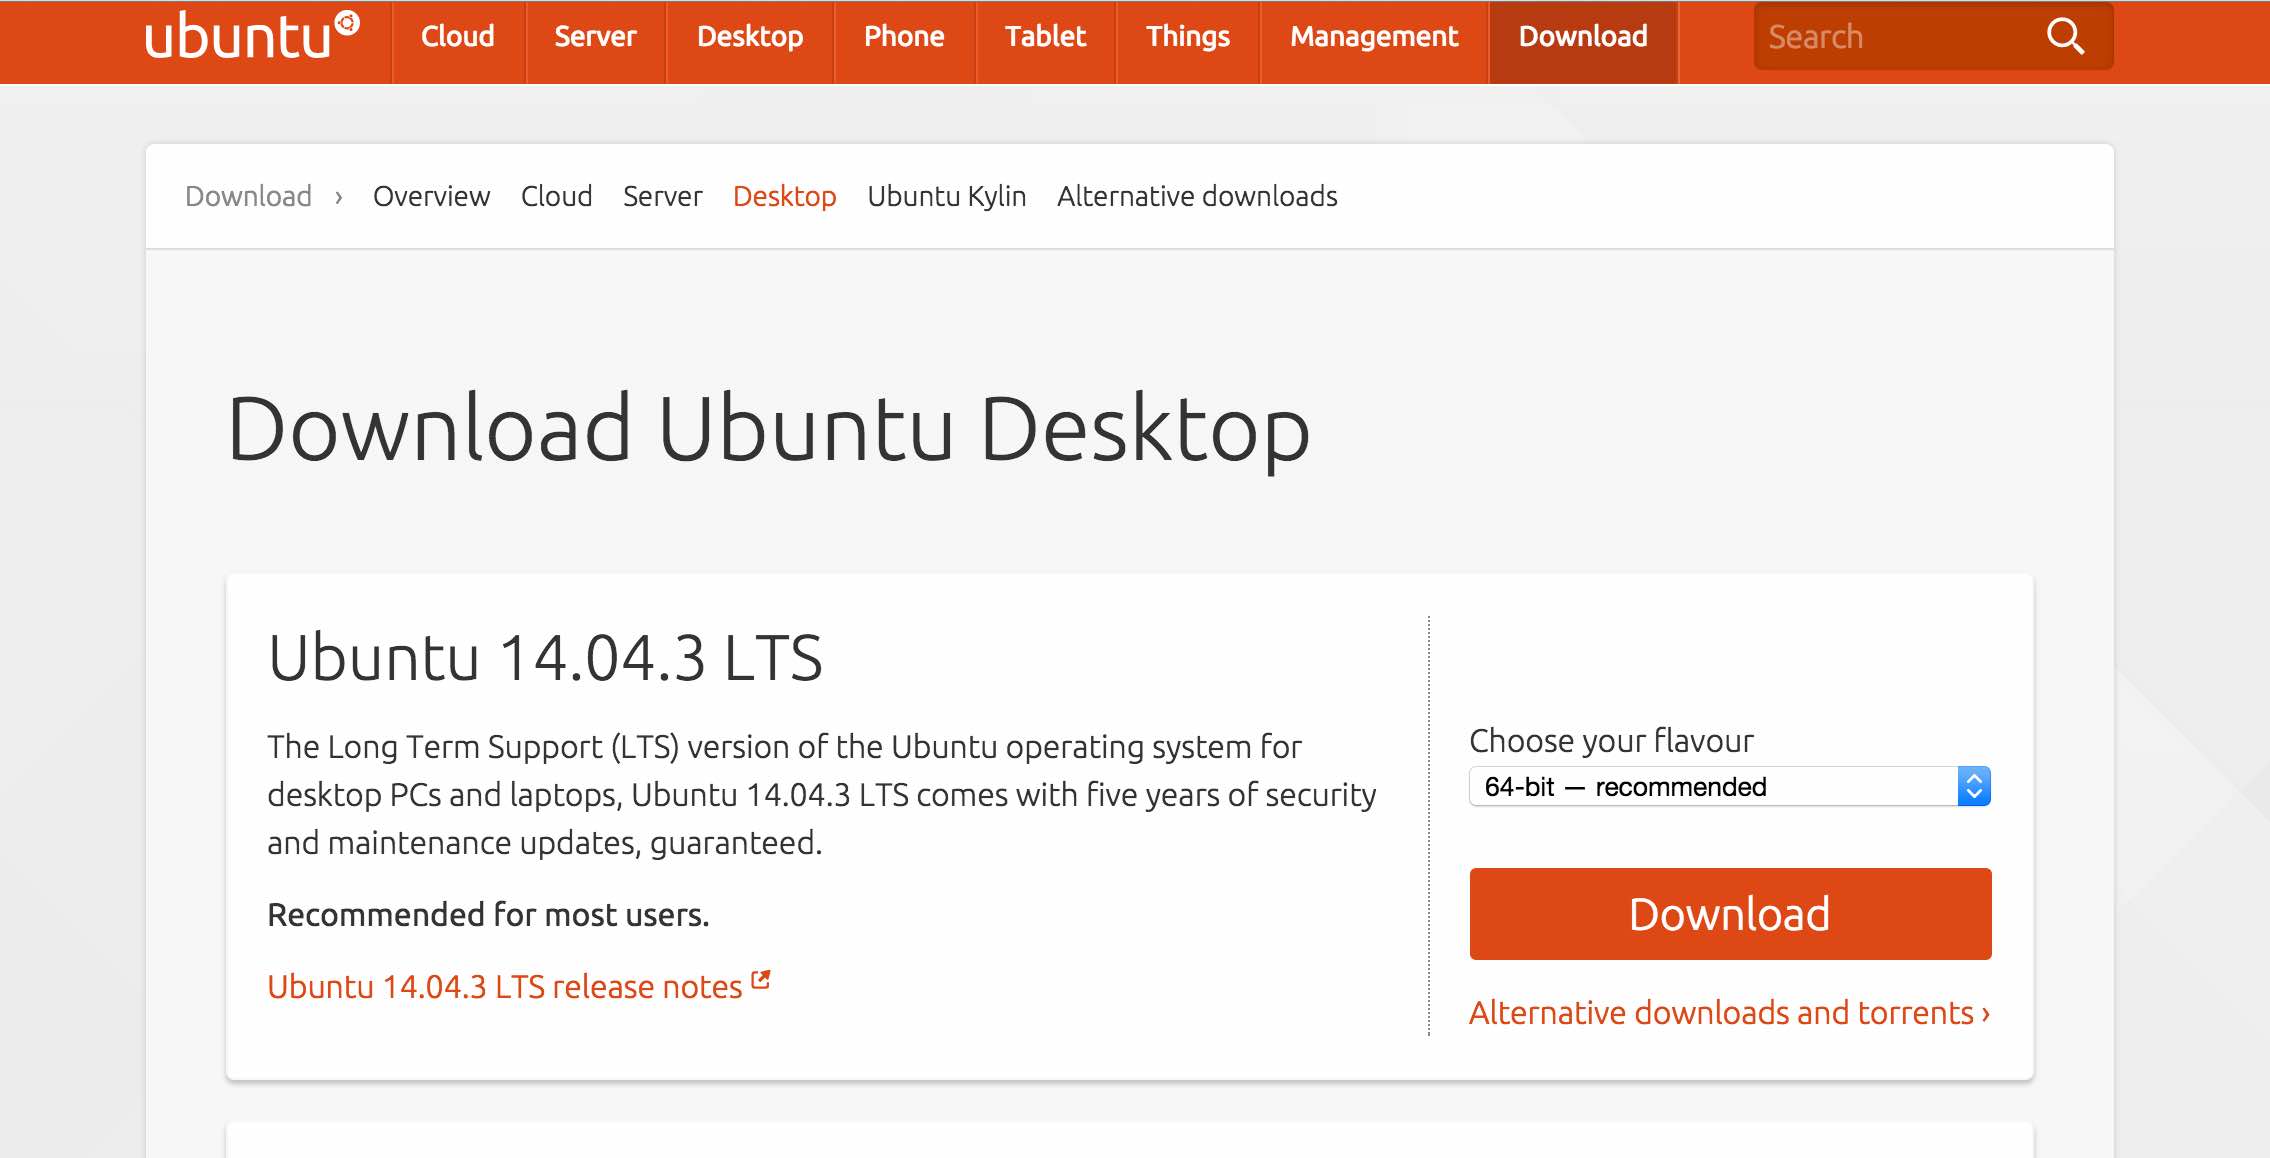
2. Download the ubuntu installation iso file from the web.
3. Install it on mac through virtual box.
Downloaded and installed Virtual Box from link:
https://www.virtualbox.org/wiki/Downloads
Downloaded Ubuntu 14.04.3 LTS from link: http://www.ubuntu.com/download/desktop
Installed Ubuntu on Virtual Box
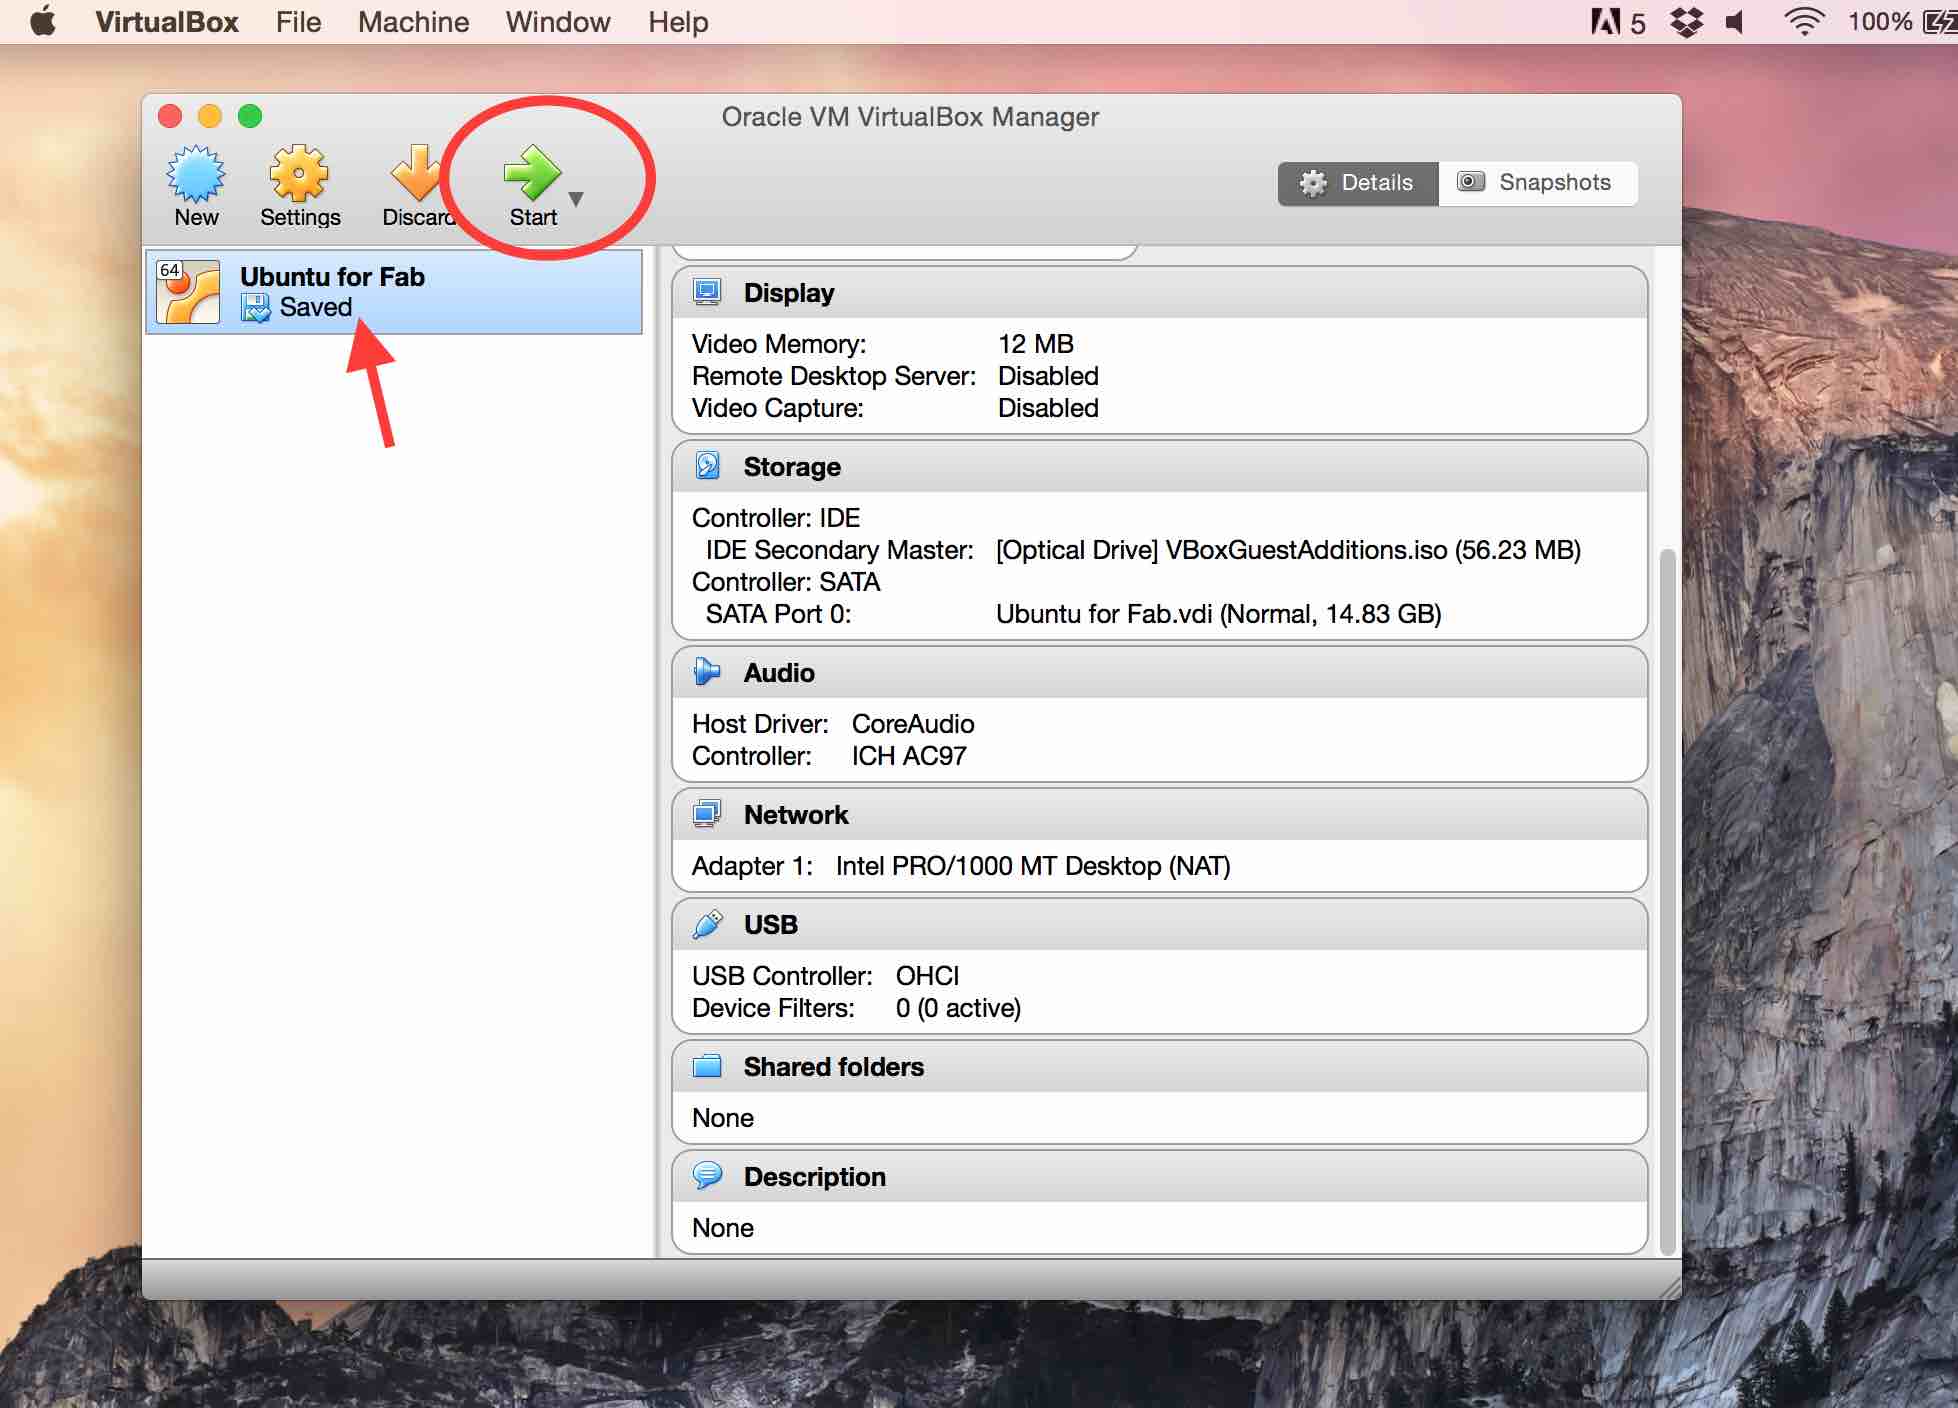
All I had to to do was to press the start button and Ubuntu was up an running on a seperate window in OSX. To my surprise, its running pretty smoothly. Thanks to the 8GB RAM on my macbook. :)
Back to top
3. Assignement: Fab Modules on Ubuntu
Once virtual Ubuntu was installed on Mac, I checked out Fab Modules. This simple web software works like a wonder and is made to operate any FabLab machine.
The compiled version was downloaded from the website.
http://kokompe.cba.mit.edu/
After downloading the file, I used the terminal to install dependencies to get started with FabModules. The dependencies on Ubuntu can be installed using the command.
sudo apt-get install python python-wxgtk2.8 python-dev python-pip gcc g++ libpng12-dev libgif-dev make bash okular libboost-thread-dev libboost-system-dev cmake
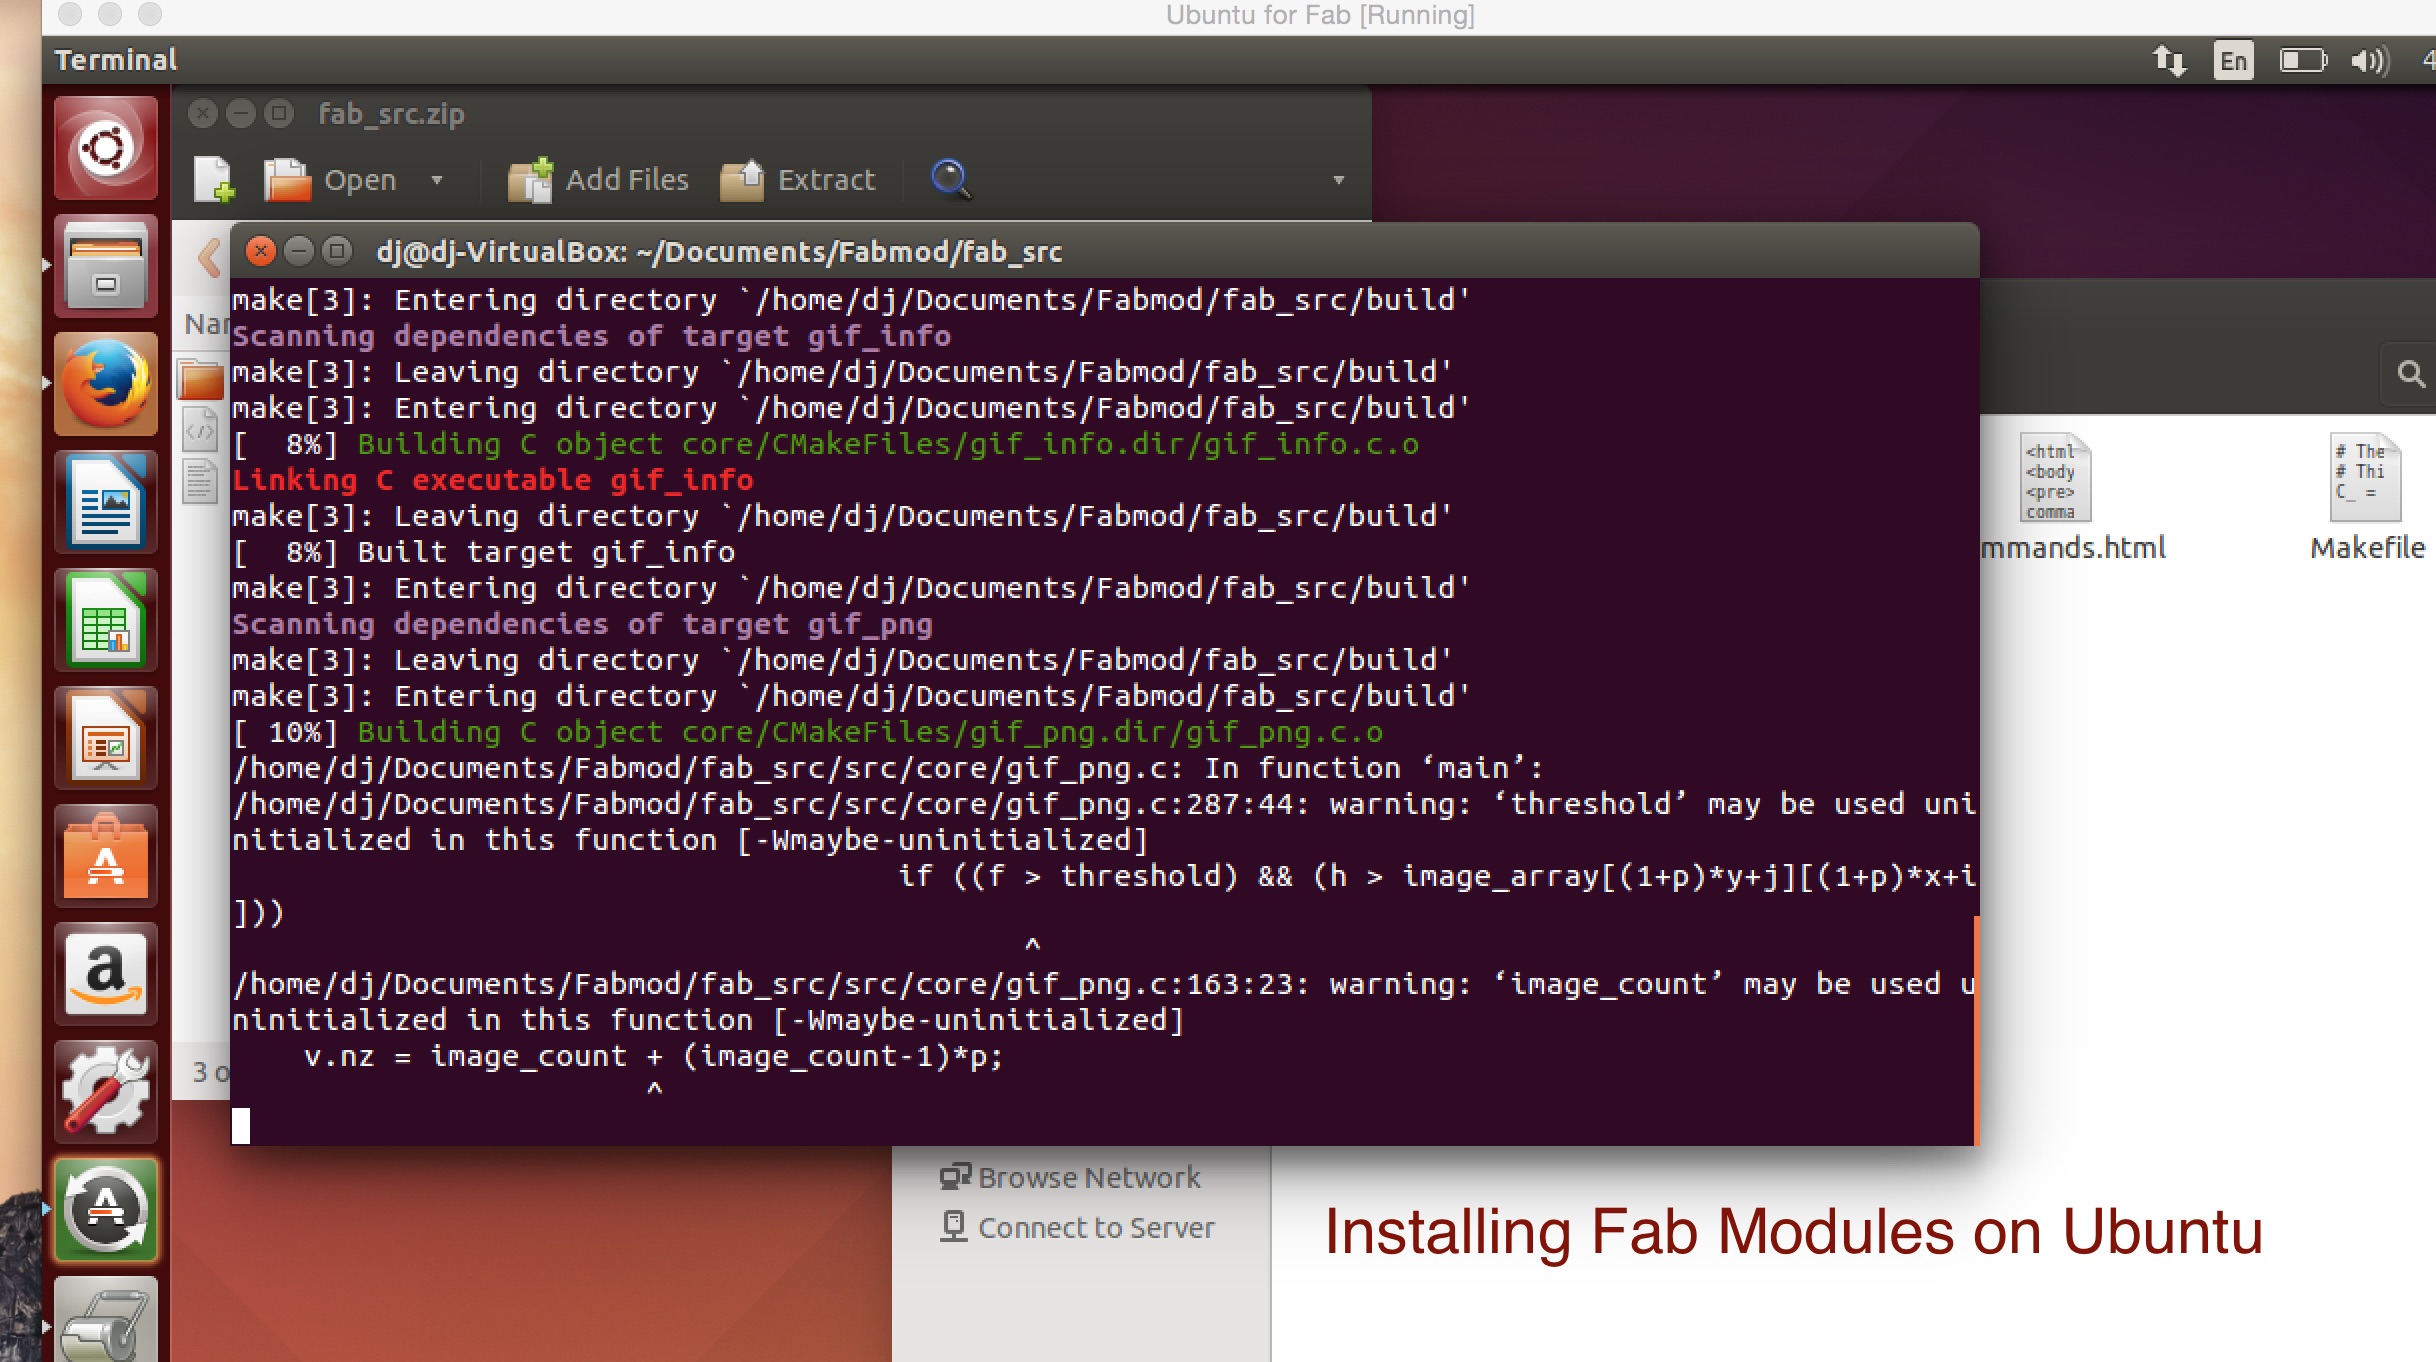
Then fab_src.zip was unzipped to a folder. I navigated to the that unzipped folder through terminal and typed the following commands to setup Fab Modules.
make fab
make install
Once this is done, the Fab Modules can be opened by typing ‘fab’ on terminal from that particular folder.
We also have another web version of fab modules which is pretty neat and easy to use. To use this, I visited the following website
http://fabmodules.org/

The input format and the output device can be chosen from a drop down list, the design file can be uploaded and that it is. This is the easiest and straight forward way touse a device.
Back to top
4. Rhino 2D and 3D design: Introduction
Rhinoceros is a really cool 2D and 3D design software. Its used for CAD in quick prototyping, designing stuff for 3D printing etc.
The 2D and 3d designs created in this software can be used on a wide array of FabLab machines like from Vinyl cutter, Shopbot CNC router, Roland Modella milling machine, 3D printers etc.
I downloaded Rhino 5 on my Mac from the link below and a signed up a the free trail. Luciano Betoldi, our trainer went forward with Rhinoceros training.
https://www.rhino3d.com/download/
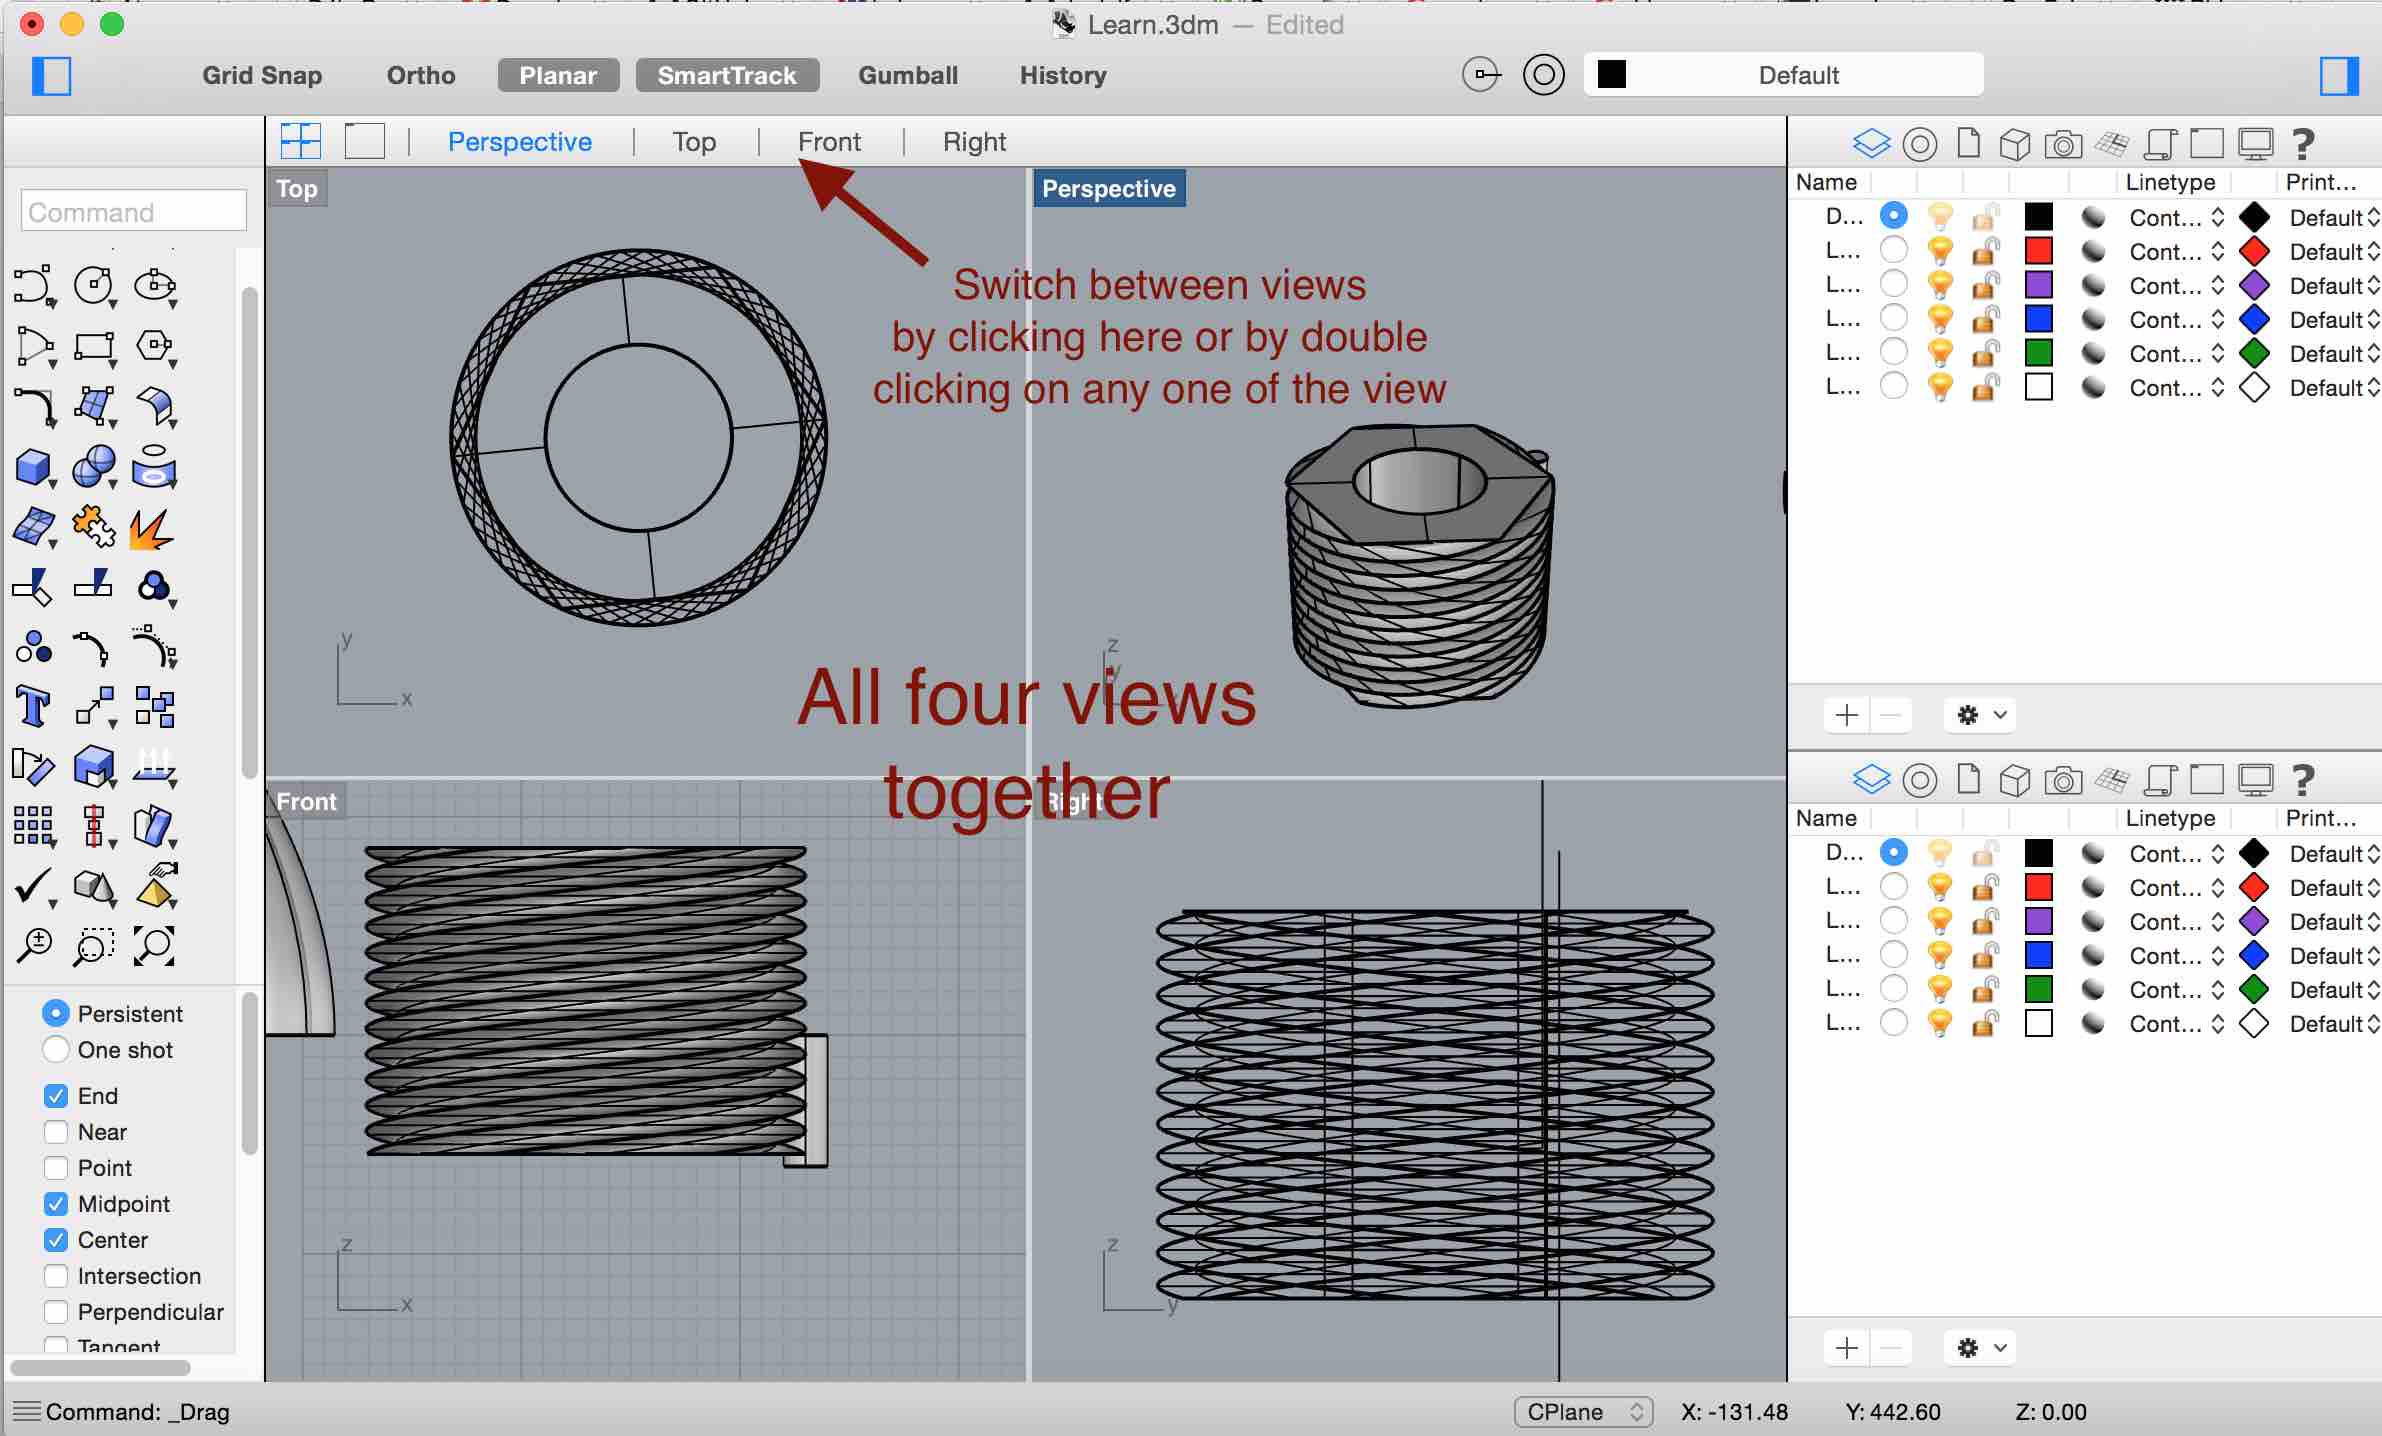
Views
While designing, the design can be view in different angles. Top, Front, Right and perspective. All four views can be viewed together in a single window. Views can be swtiched by clicking on the options abobe. Rhino also enables to rotate, zoom and view the design in different angels using mouse click and drag and scroll wheel of the mouse.
Toolbox
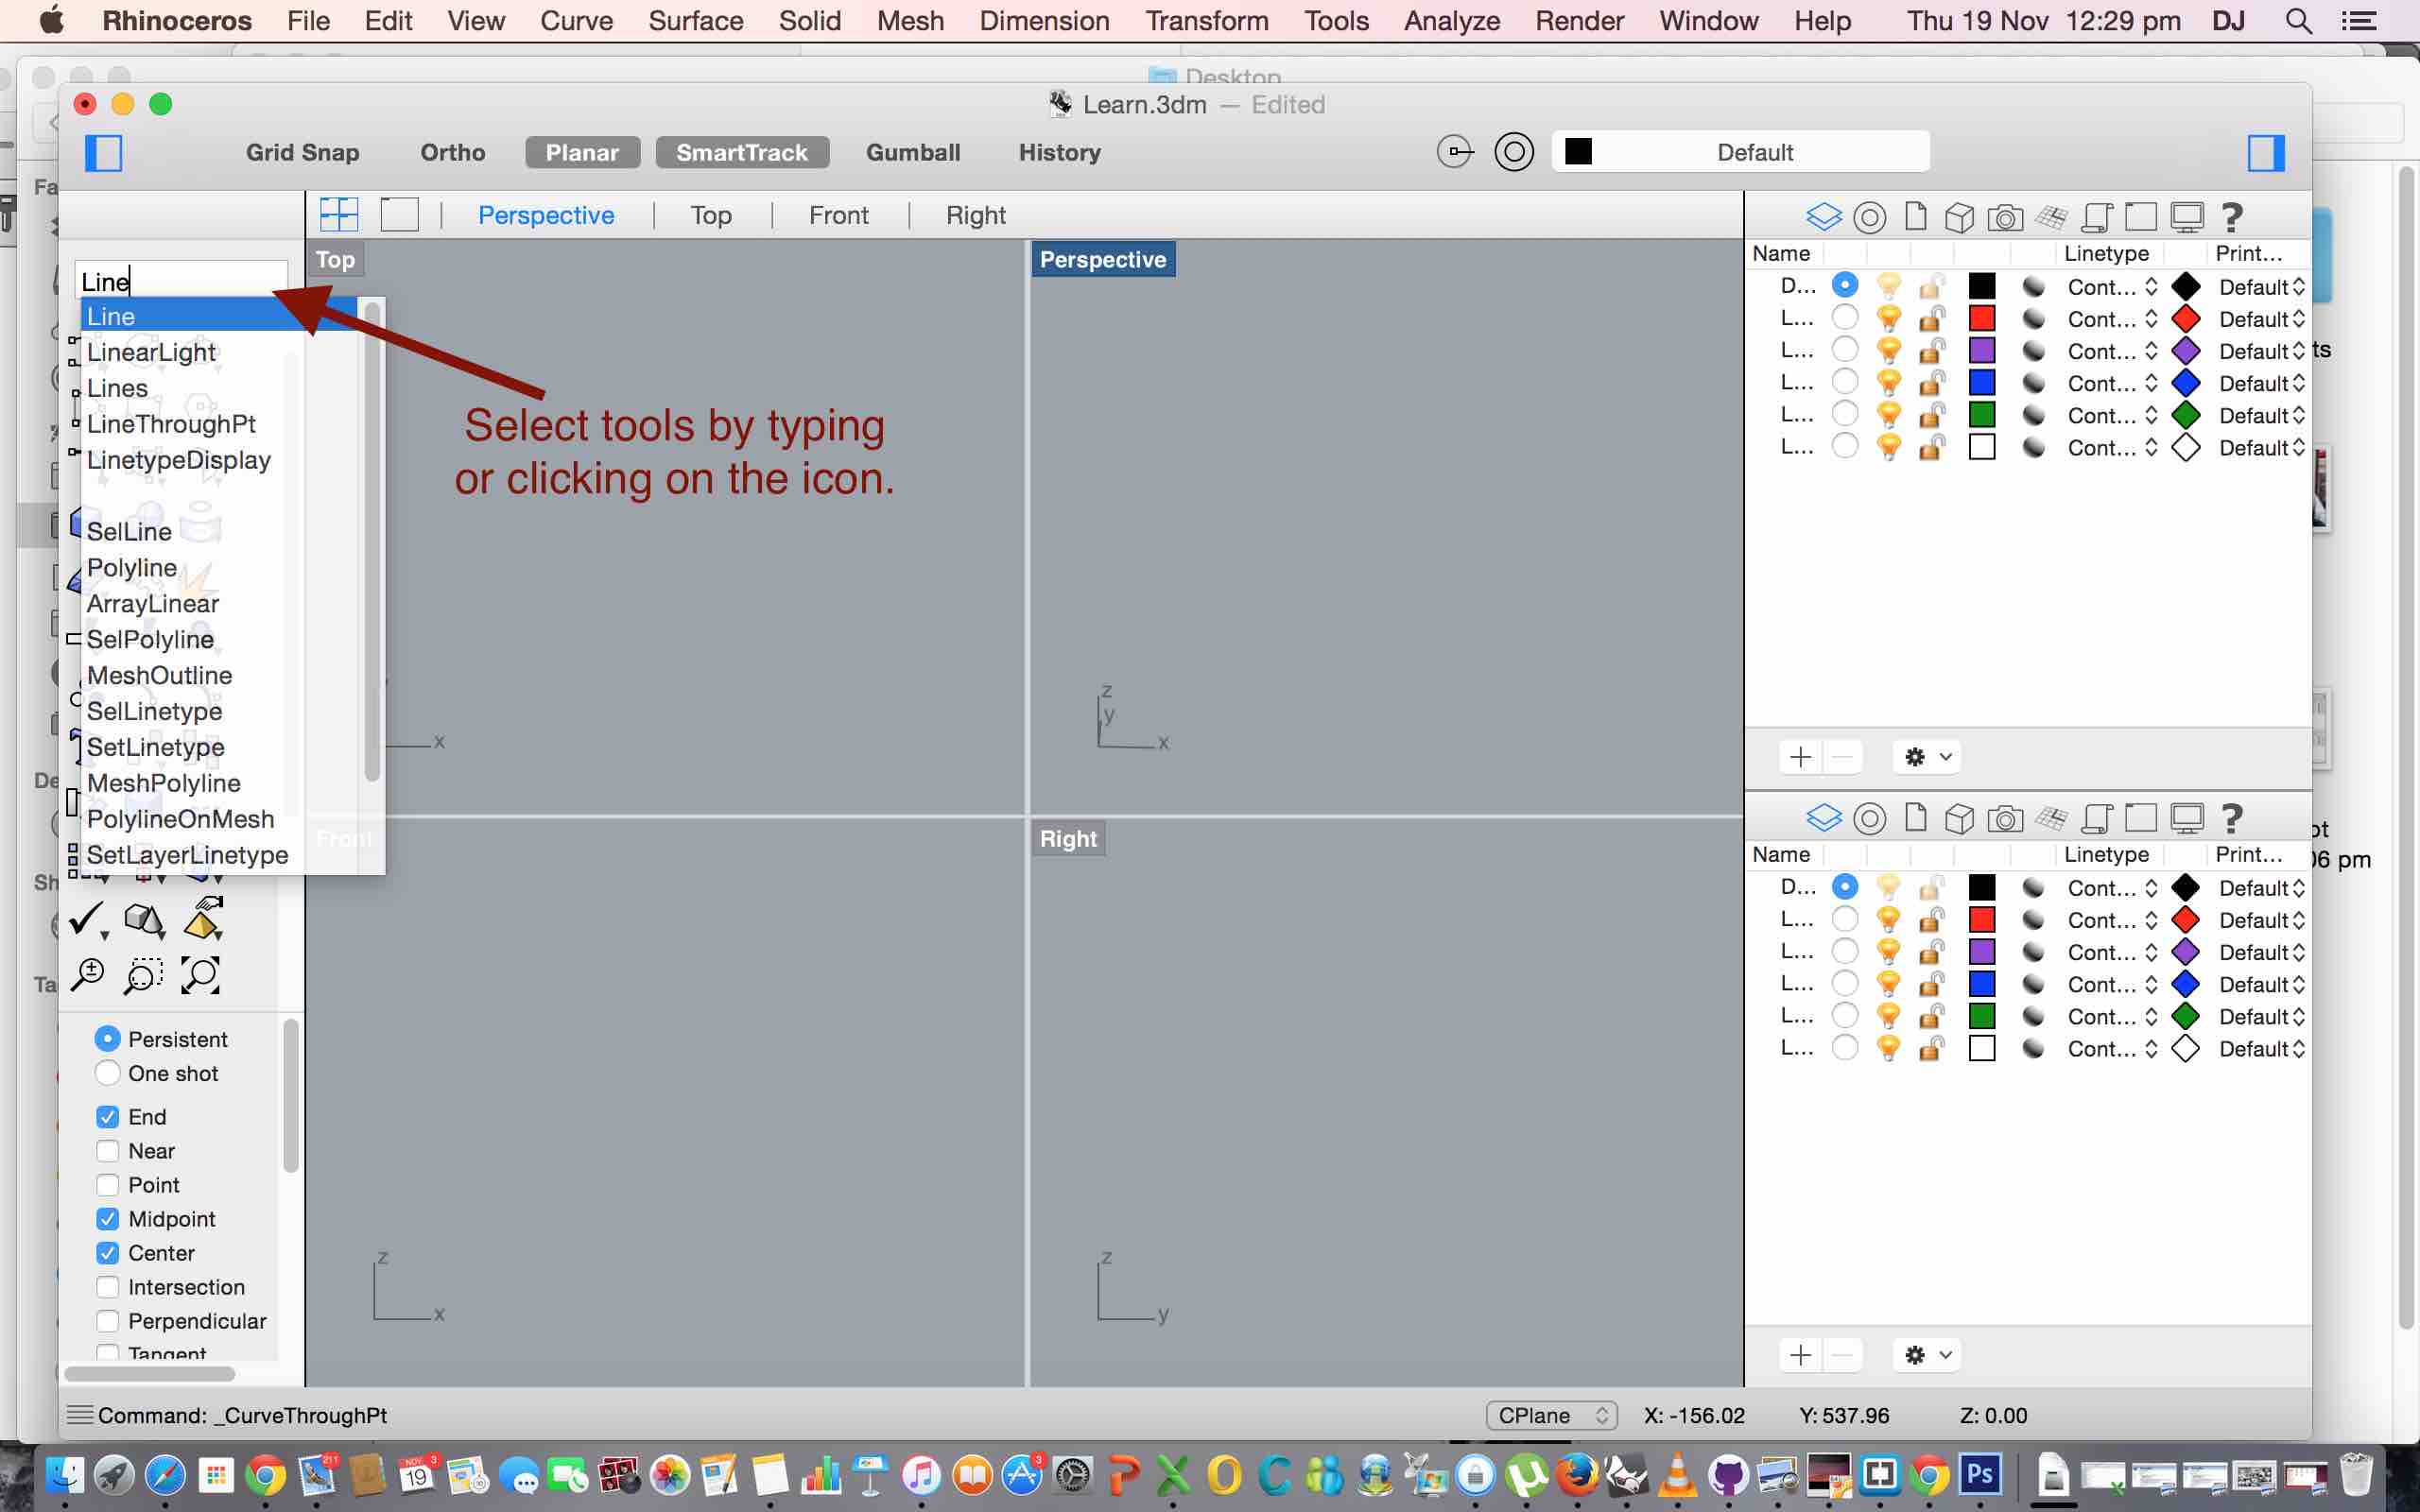 There are a wide array of tools for creating and editing designs. Tools can be selected by clicking on the tool box or by typing in the text box above the tool box.
5. Assignment: Designing in Rhino 3D
Luciano explained the way each tools works.
2D drawing tools: Point, Line, Curve, Polyline, Circle, Ellipse, Arch, Rectangle, Polygon are all used to draw 2D drawings.
Surfaces and solid creation: Surfaces from points, curves, rectangular plane and also by sweeping 1 rail and sweeping 2 rails together. Box, cone, ellipsoid, tube, pyramid can be created using the tools
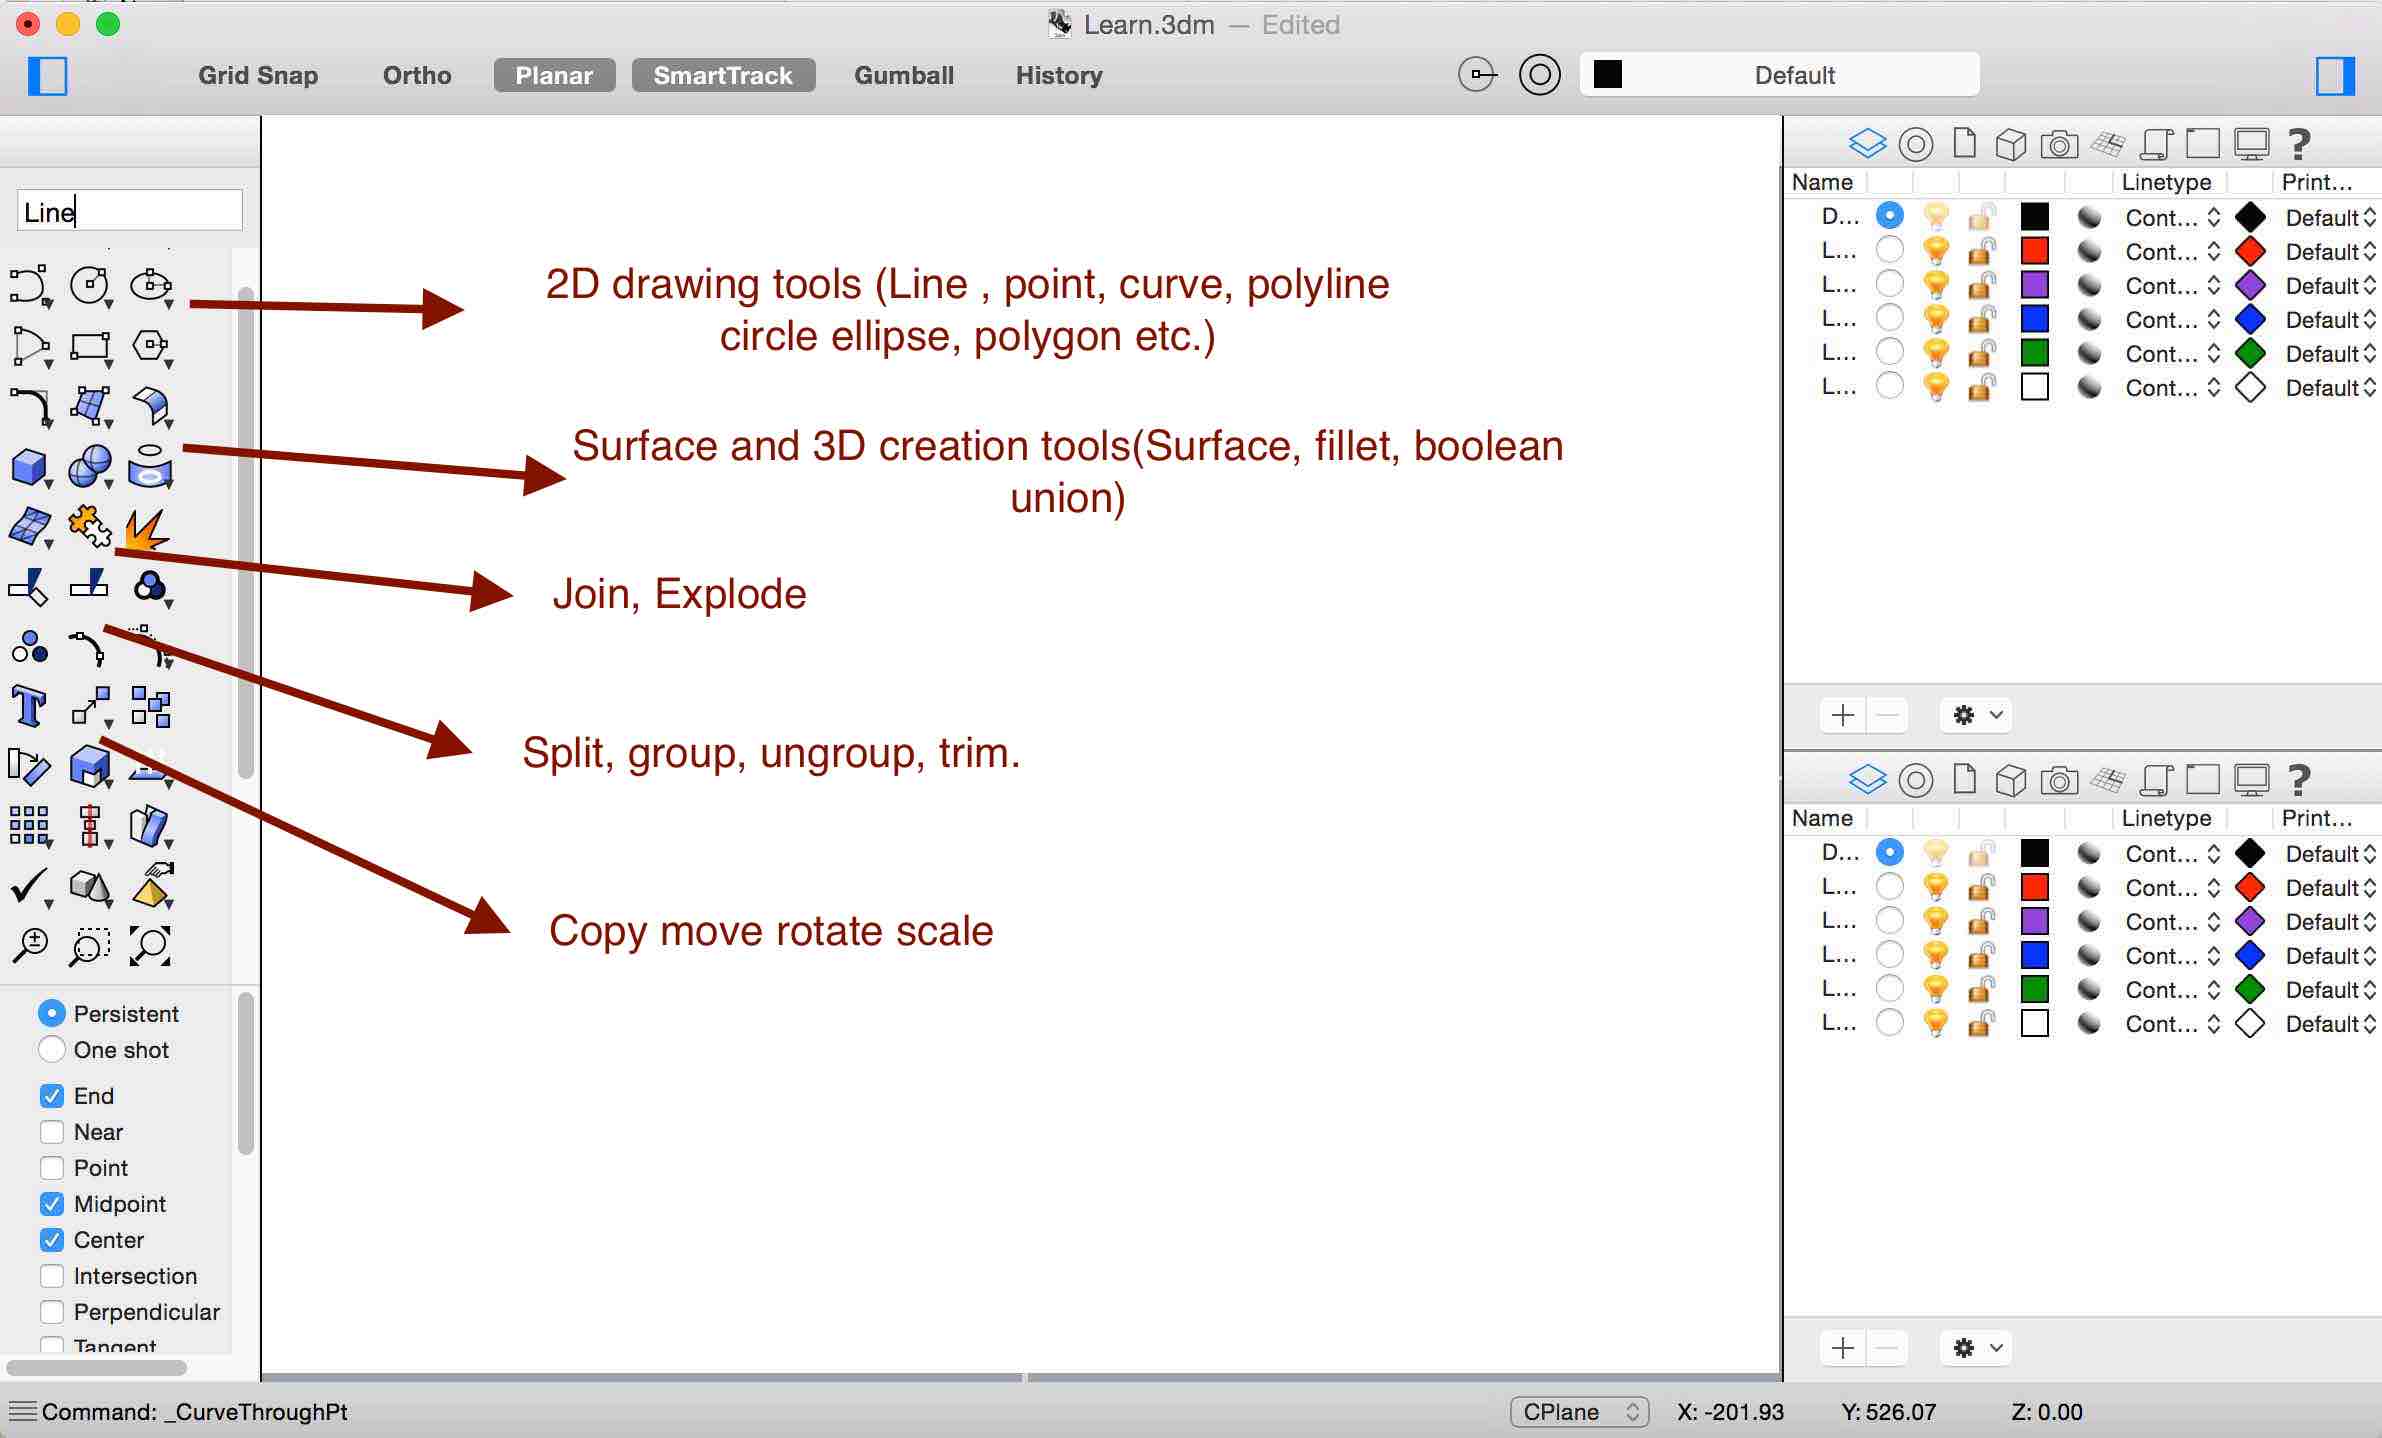
Objects ordering and transformation: Move, copy, scale, mirror, array etc makes it easy to design things. Join, explode, trim, split, group. All commands can be used in combination to create some awesome stuff.
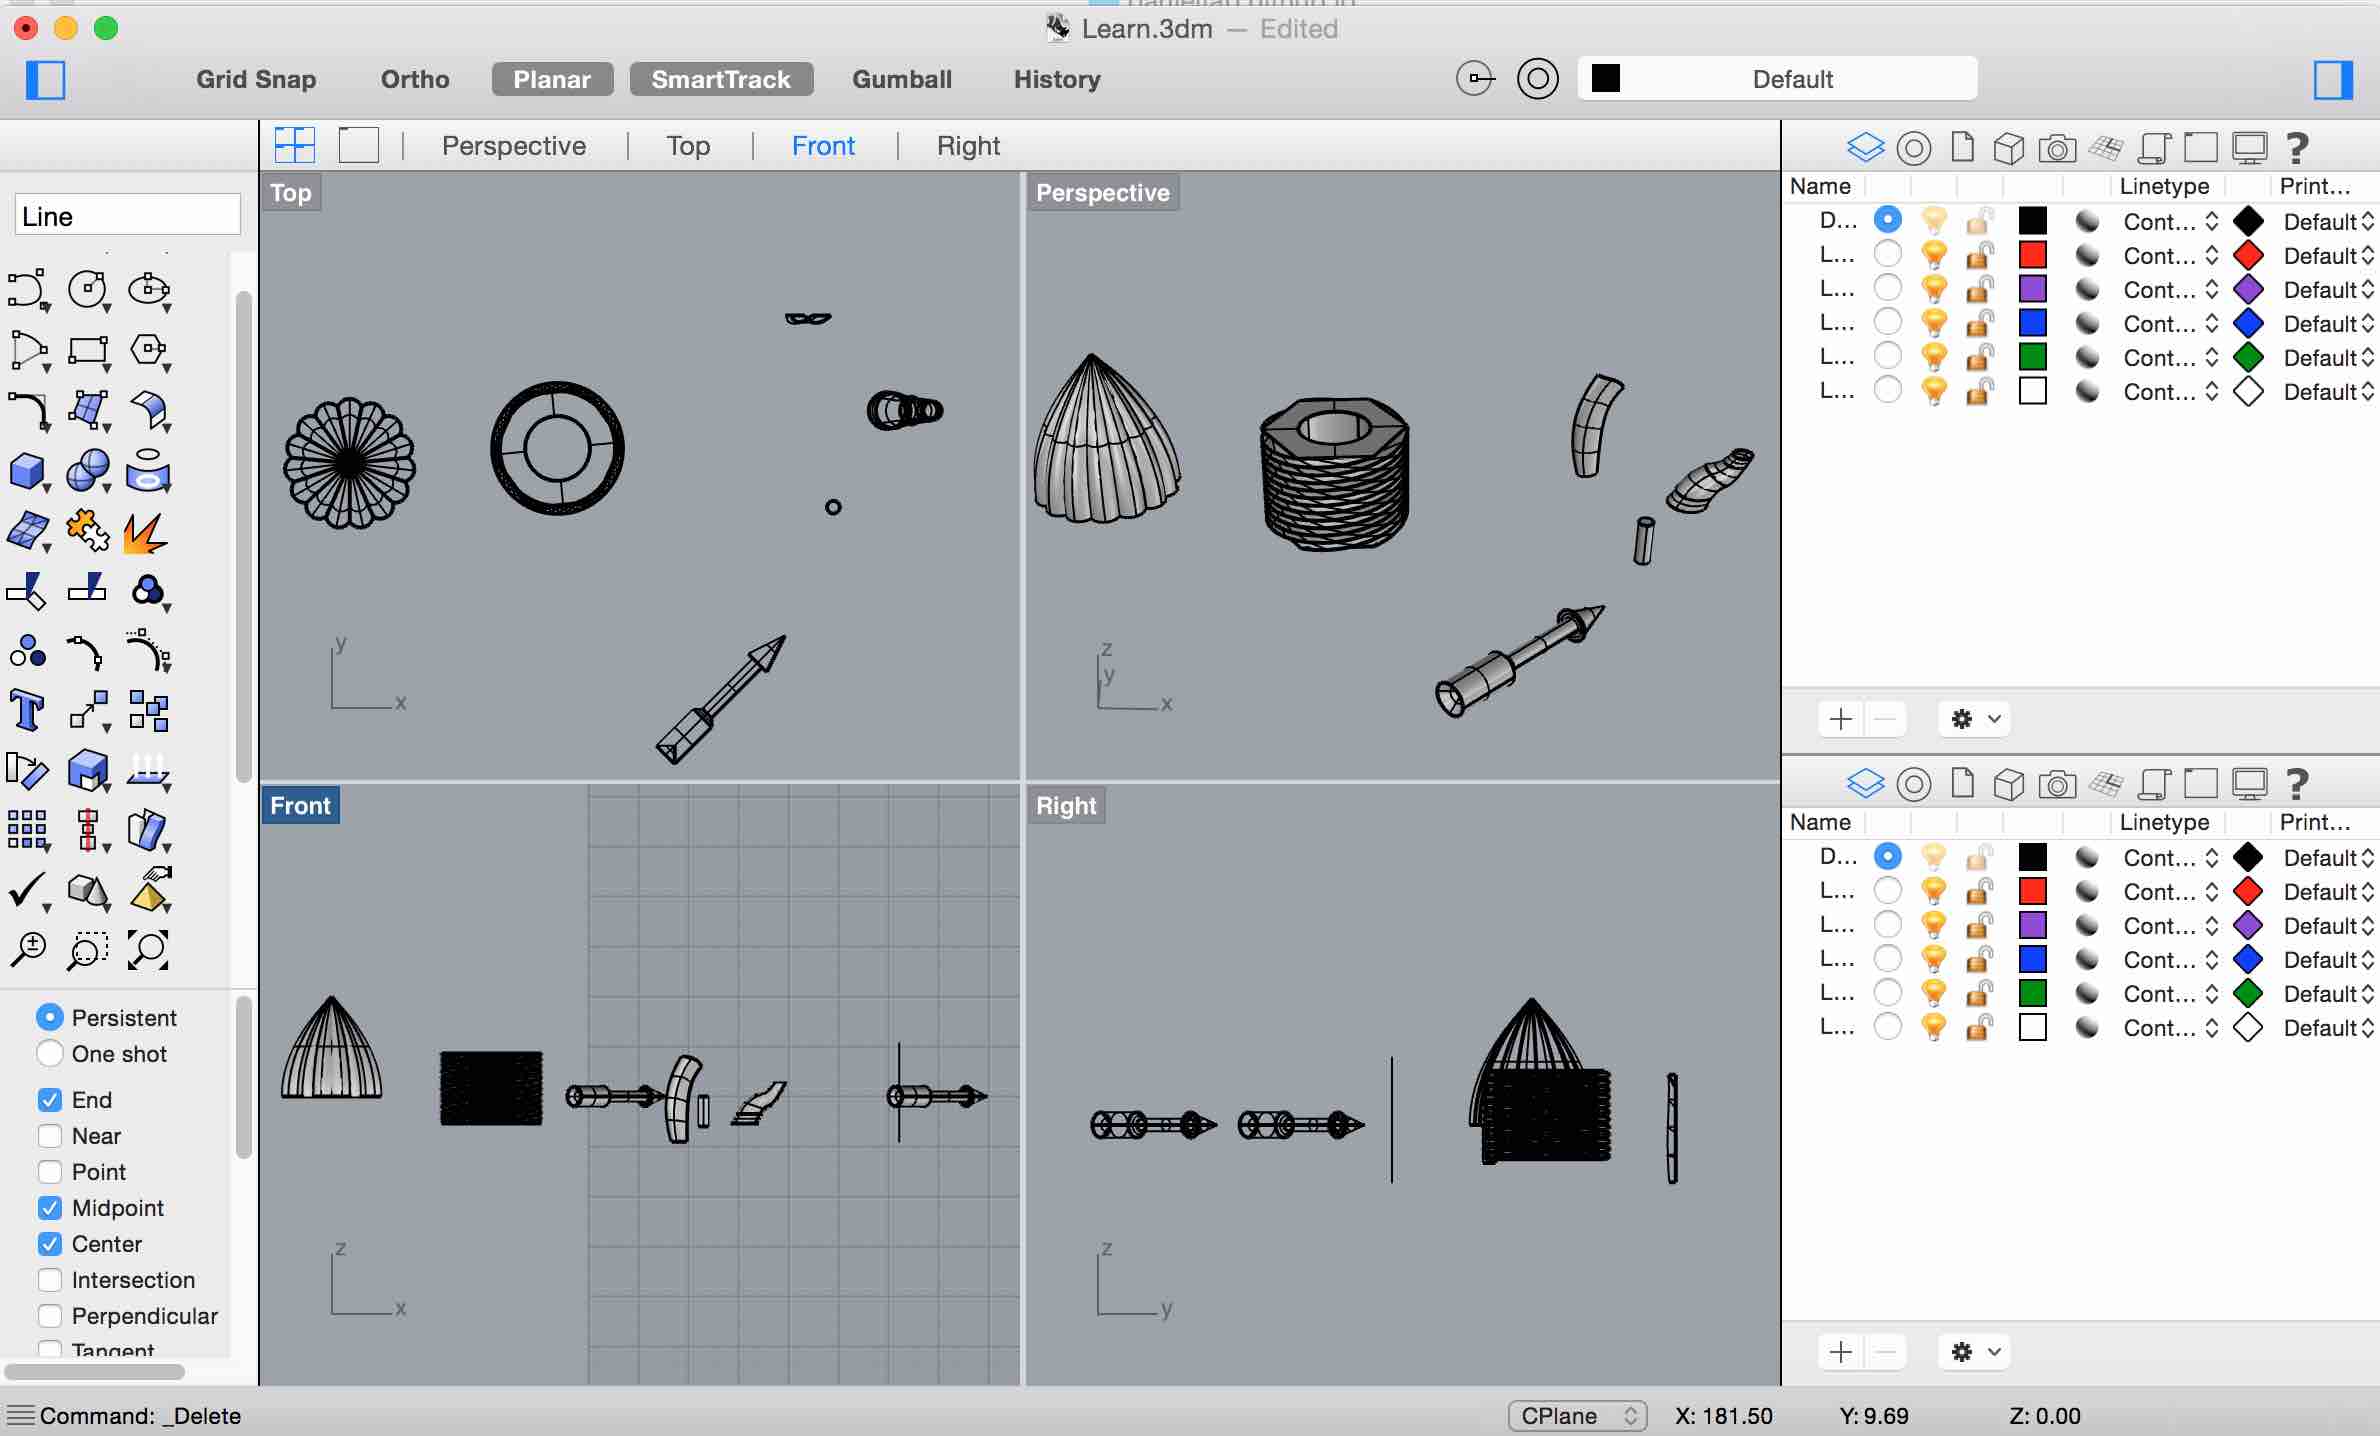 The assignment was to draw a few simple designs drawn by Luciano on white board. The above image shows my attempts at designing with Rhino.
 Download my Rhino learning file: learn.3dm